Friday, September 26, 2014

Crafty Courtney: Wine Cork Pumpkin

Hello Everyone!

Thought I would start a new little segment "Crafty Courtney"!  I am pretty into crafting, but Fall and Winter bring it out the most in me.  I thought for my first craft on here I would show you something I finally thought worthwhile to make with my overflowing collection of wine corks.  This is an EXTREMELY easy craft, so I hope it inspires you to create a fun little Fall decoration.

Here we go!


Step 1
Gather 24 wine corks along with a champagne cork.  Corks do not have to be from the same brand, but I had so many Dreaming Tree Crush corks (and am incredibly anal), so I used only those.
Step 2
Round up your supplies: Green and orange acrylic craft paint, paper plate, two brushes, newspaper, a toothpick, and of course all 24 corks!
Step 3
Now it is time to paint your corks.  Pour both green and orange paint onto the paper plate and simply dab the uncorkscrewed end of the cork into the orange paint.  Use a paint brush if needed to distribute the orange paint more evenly.
Step 4
Place each cork on a newspaper to dry.  Use a paint brush and toothpick to paint the champagne cork green.  I then ever so professionally used a pepper shaker to hold the cork and toothpick whilst drying.  Get creative ;)

Step 5
Whip out your glue gun and while it is heating up organize the corks into their designated positions.  You will have 2 rows of 4 and 5, and 1 row of 6.

Step 6
Glue each of the 5 sections together and let the glue dry.
Step 7
Glue all of the sections on top of each other, then glue the stem on top of your finished pumpkin!
I hope you all enjoyed this simple, yet adorable craft!  I cannot wait to make some more of these for upcoming holidays and season.  Have any of you made any crafts lately?  If so, let me know in the comments below :)

- Courtney

Tuesday, September 23, 2014

Sew Cute: Infinity Scarf Tutorial

Hello Everyone!

With Fall finally here TODAY, I thought I would share an easy and practical tutorial on how to make an infinity scarf.  I am a big fan of infinity scarves, but I find them to be incredibly overpriced.  I was able to make two scarves for $6.13, which is amazing since the scarf I modeled it off of was listed for $26.00...YUCK!  This took me a total of 10 minutes to complete and I am already planning on wearing it this weekend while I am away on a ladies trip ;)

Infinity Scarf

What you need:

- 2 Yards of fabric
- Thread

Step 1
Cut fabric in half lengthwise with a width of around 22 inches.
This gives you material for two scarves! 
Step 2
Fold the fabric right sides in, and stitch along the open edge.
Step 2 Completed
Step 3
Take the scarf as it is in completed Step 2, and pull one end all the way through till it is in half.  (make sure the seam you just made is even).  Then you will take the circle opening and sew around leaving about 3 inches unsewn.  (as show above)
Step 4
After you have finished sewing around the circle, pull the scarf out through the 3 inch area you left unsewn.
Step 5
Your scarf is nearly complete!  Hand stitch the 3 inch opening shut and you have yourself a brand new infinity scarf :)
TA DA!  The finished scarf :)
Hope you all enjoyed this tutorial and can recreate the scarf above.

- Courtney

Monday, September 22, 2014

Exercise of the Week: Plié Squats

Hello Everyone!

Hope your arms got a nice workout this past week.  Going to bring it back to the lower body this week with a tweak to a popular exercise.  Many people are familiar with basic squats, but something so easy as adjusting your foot position can work some additional muscles, so I introduce you to Plie Squats!  Think basic squat, but turn your feet out to the corners of the room at a 45 degree angle and then perform the squat.  Feel those inner thighs burning??  I thought so ;). I challenge you to perform 3 sets of 15 Plié Squats 3 times this week.

Plié Squats
Muscles Worked: Quads, Glutes, Inner Thighs, Hamstrings, Hip Flexors, and Calves
 
Starting Position
Standing with legs hips distance apart with feet turned outwards at 45 degree angles

Second Position
Go down into the squat
To add more difficulty feel free to add dumbbells in both hands and keep on hips or hold one heavy weight down between legs and try to touch the ground without compromising form!

Enjoy :)

- Courtney

Friday, September 19, 2014

Good Eats: Cap'n Crunch Crab Cake Recipe

Hello Everyone!

Tonight I am making one of my favorite dishes ever, CRAB CAKES!  I cannot explain my love for these babies, but this recipe has been so good to me over the past 4 years, and each time I make it, they get yummier and yummier :)  I do not make these often as crab meat can be pretty pricey, but these are a great special event food, or can even be made as appetizers by making smaller cakes.

Ingredients:
- ¾ cup mayonnaise
- ½ tablespoons garlic powder
- ½ tablespoons chili powder
- 1 tablespoons lime juice
- 1½ teaspoon grated lime peel
- 1 pound lump crab meat
- 1½ cup chopped fresh cilantro
- 1/3 cup chopped red onion
- 1 egg, lightly beaten
- 3 cups panko flakes (Japanese-style bread crumbs)
- 2 cups crushed Cap'n Crunch (about 3 ½ cups uncrushed)
- Olive oil for frying

All of the ingredients!

In a small bowl, mix together the mayonnaise, chili-garlic sauce, lime juice, and lime peel.
In a bigger bowl, combine the crab meat, cilantro, and onion.
Stir in 1/3 cup of the mayonnaise mixture and the egg.
Reserve the remaining mayonnaise mixture for garnish
In a third bowl, combine the panko flakes and Cap'n Crunch.
I use a potato masher to crunch up all the Cap'n Crunch.
Stir 1 ½ cups into the crab mixture.
On a baking sheet or dish, form into cakes (size depends on your preference) on parchment paper.  Then, pour the remaining Cap'n Crunch mixture over the top of all the cakes.
Chill at least 1 hour or up to 8 hours.
In a large skillet, heat olive  oil over medium-high heat. Cook until golden brown and cooked through, about 4 minutes per side, adding more oil as needed.
I like to serve my crab cakes with asparagus, makes for a delicious dinner.
Enjoy :)

- Courtney

Tuesday, September 16, 2014

Girls Trip to Michigan

Hello Everyone!

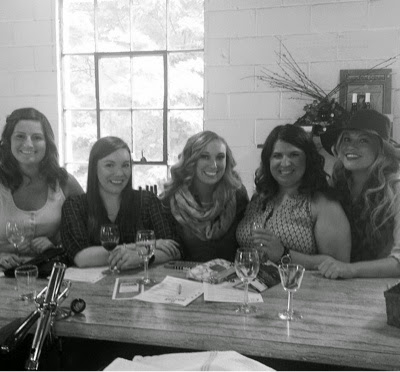
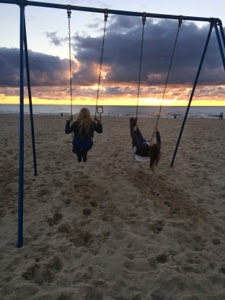
This past weekend my girlfriends and I traveled up to St. Joseph, MI for an extended weekend getaway.  We chose St. Joseph because it is only an hour and half away, but boasts very great wineries and shops and is nestled into an adorable beach town on Lake Michigan.  We got up there on Thursday evening and enjoyed a nice burger dinner and had a bit too much fun at our hotel's bar.  We spent most of Friday touring wineries (Hickory Creek Winery, Tabor Hill Champagne Cellar, and Gravity Winery) and had a completely unique experience at each and drank delicious vino for hours!  After our winery tours, we went out to dinner and called it an early night.  We spent all of Saturday popping in and out of the cute shops in town and stopped at some more tasting rooms.  We went out to a yummy dinner at Ryebelles and then watched the sunset on the beach.  Overall, it was a fantastic weekend and I thought I would share some snaps from our trip :)


Do you have any trips planned?  Share in the comments below, as I'd love to know where you are traveling to!

- Courtney

Monday, September 15, 2014

Exercise of the Week: Arm Circles

Hello Everyone!

Welcome back!  Hope your legs feel good after last week's Power Jacks ;)  As promised here are my results:

Day 1: 14-15-15-12-14-9-12-13
Day 2: 16-14-15-16-14-10-10-12
Day 3: 16-16-15-17-13-11-8-13

How did you all do?  How many days were you able to challenge yourself to perform more?

This week I decided to shift the focus away from legs....and cardio and stick to something simple yet effective.  I came up with Arm Circles!  This is such an easy way to tone your arms and you literally need no equipment, no special clothing, and can do them ANYWHERE!  I like to incorporate Arm Circles into my treadmill walks at work, but I also do them at home, my desk, or while watching TV.  I challenge you to perform 3 sets of 2 consecutive minutes or Arm Circles 3-4 times this week!
 
Arm Circles
Target Muscles: Shoulder Girdle Muscles (Trapezius, Levator Scapulae, Serratus Anterior, Sternocleidomastoid, Rhomboids, Pectoralis Minor)
Stand with your legs shoulder width apart and your arms out like a "T" maintaining relaxed shoulders.  Make small circles with your arms moving forward or backwards (or alternating throughout the 2 minutes) while maintaining the posture shown above.  Perform Arm Circles with or without weights.
This is a great exercise to perform at the start of your workout as it not only works your shoulders, but it provides a good stretch before heavier lifting.  It helps improve posture, too!

Enjoy :)

- Courtney

Monday, September 8, 2014

Exercise of the Week: Power Jacks

Hello Everyone!

Hope you all had an amazing weekend and are feeling just as motivated as I am this week!  I have been battling waves of intense motivation followed by even more intense waves of laziness... Thus ruining any progress attained from my short bursts of productivity.  This week's exercise is Power Jacks aka intense jumping jacks with a squat ;). I challenge you to perform this exercise using the TABATA training method.  TABATA is a great way to get more out of your workouts because you are performing at high intensity followed by short periods of rest.  To perform the Power Jacks or any other single exercise using the TABATA method you will perform Power Jacks for 20 seconds followed by 10 seconds of rest for a total of 4 minutes.  During the 20 seconds you are performing the Power Jacks you want to make sure you are working at your highest performance level.  Count how many you are able to do during each 20 seconds of the 4 minutes and see how you progress over the week!  I will let you know how my numbers fair :)

Power Jacks
Target Muscles: Total body with an emphasis on the lower body
 

Step 1
Begin with your feet together and your hands above your head.

Step 2
Jump both feet out and down into a squatting position. Jump feet back together and return to the starting position in Step 1.
GOOD LUCK!

- Courtney

Tuesday, September 2, 2014

August Stretching Challenge - Completed!

Hello Everyone!

Cannot believe August has already come and gone, but I am glad that fall is creeping up on us.  As mentioned in this post, I embarked on a stretching challenge for the entire month of August because I was disappointed with the amount of flexibility I have lost over the years.  Since I took yesterday off of blogging due to the Holiday, consider this your weekly dose of exercise from me ;)

Below I have included my before and after photos from the challenge.  Unfortunately I did not get 10 minutes of stretching in each day, but I did increase the amount of stretching I was doing and have started doing Yoga at work once a week.  All in all, I think this will be a constant challenge, but slowly but surely I hope I can make this a daily habit.

Slight improvement after a month!
A little bit further ;)
Almost to the floor :))
About the same, but it is my bad leg, so I'll take it!
I wish I would have committed a bit more to this challenge, but as I mentioned before I did more stretching this month than I have in a long time.  I have made a little bit of progress too with my flexibility, so I will be keeping this up :)

Did any of you participate in the August Stretching Challenge?  If so, let me know how it went for you!

- Courtney